|
Important Notes Before Using the Course Registration System
|
|
I. Add the course registration system as a trusted site and set the trusted site security settings.
II. Browser settings for IE 6 and above.
III. Close any settings or related programs that might block pop-up windows.
IV. Recommended screen resolutions are 1024x768.
Operation instructions for notes I & II above
|
(I. Add the course registration system as a trusted site and set the trusted site security settings. |
| |
Operation steps are as follows |
| |
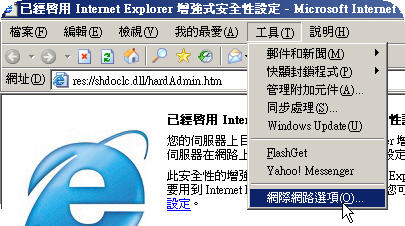
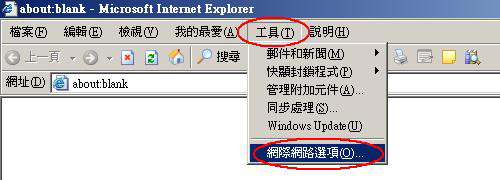
1. Open IE browser, select "Tools" from the menu bar→ "Internet Options". |
| |
|
| |
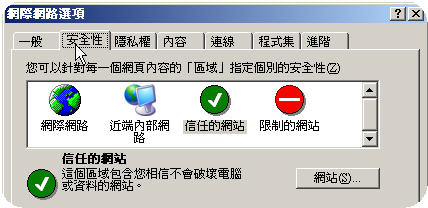
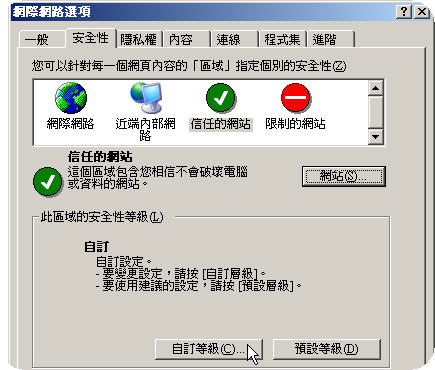
2. Open "Internet Options" window, select "Security" tab. |
| |
|
| |
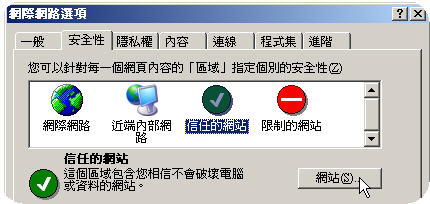
3. Select "Trusted sites". |
| |

|
| |
4. Click "Sites" button. |
| |
|
| |
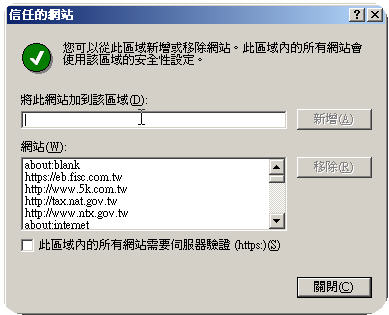
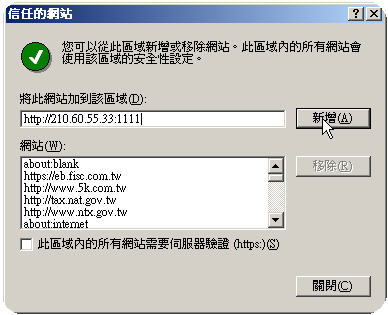
5. After the "Trusted sites" window is opened, enter URL of the course registration system in the "Add this website to the zone" textbox, the URL is shown to the right: http://210.60.55.33:1111. |
| |
|
| |
6. After entering the URL, click "Add" button. |
| |
|
| |
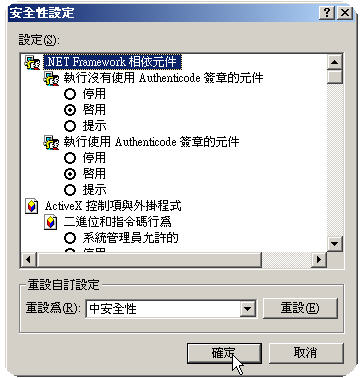
7. Set security settings for "Trusted sites". Click "Custom level..." button in the "Security level for this zone" block. |
| |
|
| |
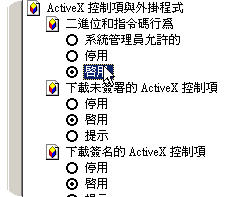
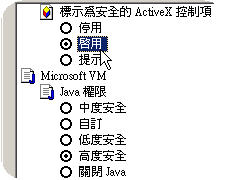
8. Set "Security Settings" details. Please set the value for each item shown in the figures below. |
| |

|
| |

|
| |

|
| |
9. Click "OK" button after the values are set. |
| |
|
II. Browser settings for IE 6 and above. |
| |
1. Open IE browser, select "Tools" from the menu bar→ "Internet Options". |
| |
|
| |
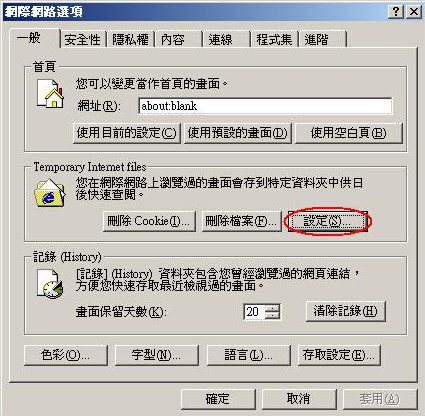
2. In the "Internet Options" window, click "Settings" button under "Temporary Internet File" in the "General" tab to open the settings window. |
| |
|
| |
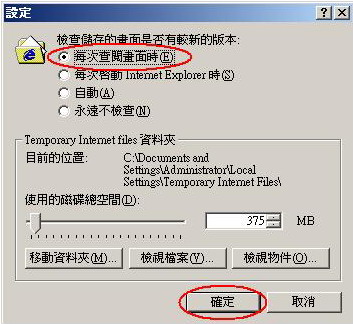
3. Set "Check for newer versions of stored pages:" as "Every time I visit the webpage", then click "OK" button. |
| |
|
|
Course Registration System Interface
|
|
Course registration system's main interface can be divided into three blocks
I. Menu bar block
II. Student course registration basic information block
III. Operation window block
Instructions for each individual block are as follows
|
| |
I. Menu bar block |
| |
Information shown in this block includes 4 menu buttons of "Course registration academic year/semester", "Current course registration stage", "Course registration start and end time", "List of windows", and "Exit course registration system". |
| |
|
| |
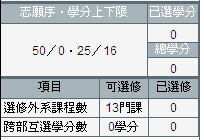
II. Student course registration basic information block |
| |
1. Information shown in this block contains "Student registration basic information", "Desired sequence and upper/lower limits of basic credits", "Credits registered", "Total credits".
2. During the drop/add stage, "Credits registered" will be updated immediately according to courses added or dropped.
3. During the drop/add stage, "Total credits" will be updated immediately according to courses added or dropped.
4. "Available number of courses as interests electives", "inter-department course credits upper limit"
|
| |
 |
| |
III. Operation window block |
| |
1. The default window in this block is the "Class/department course list".
2. If you want to display other windows just click the "Windows list" button in the "Menu bar block".
|
| |
|
| |
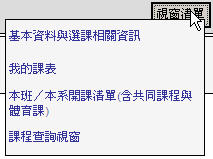
The preset window options in "Windows list" are
"Basic information and course registration related information", "My schedule", "Class/department course list", and "Course inquiry window".
|
| |
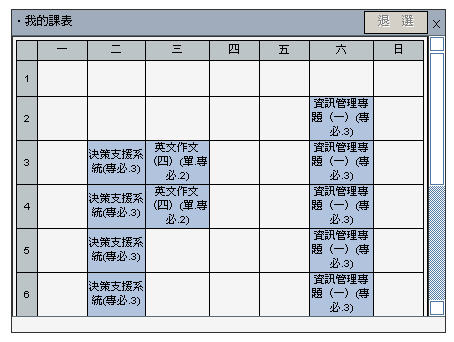
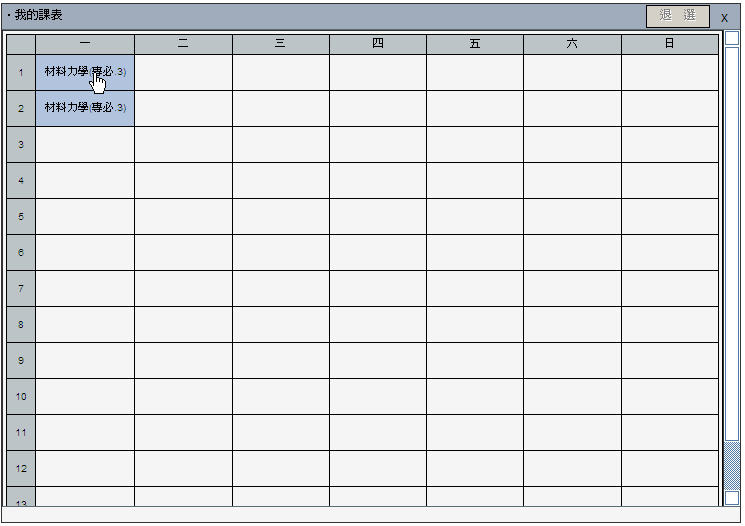
4. "My schedule" window.
(1) During drop/add stage it displays courses registered; added courses are shown in the schedule immediately.
|
| |
|
| |
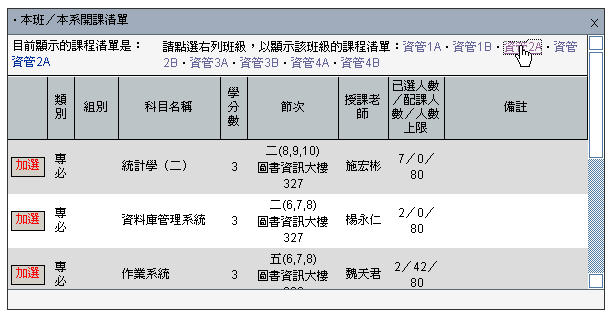
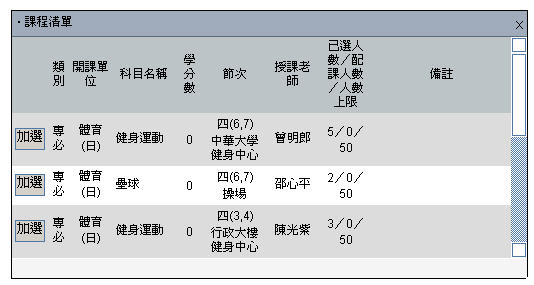
5. "Class/department course list" window. |
| |
(1) Display list of courses offered in the class by default.
(2) Select a particular class in the class list, then it will display the list of courses offered in that class.
(3) In the course list, the "Add" buttons are shown as red for courses that had been registered. |
| |
|
| |
|
| |
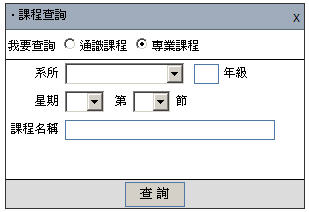
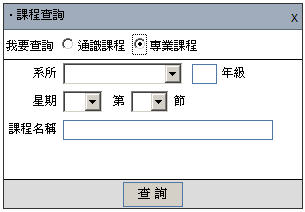
12. "Course inquiry window". |
| |
(1) You can choose the course type that you wish to inquire about.
(2) You can choose different inquiry conditions under each course type.
(3) In the course list, the "Add" buttons are shown as red for courses that had been registered. |
| |
|
| |
|
| |
|
|
Course Inquiry
|
|
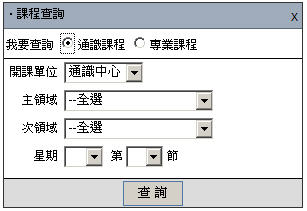
I. If you wish to inquire about other courses, you need to use the "Course inquiry window".
II. Steps for course inquiry are as follows
|
| |
1. Select course type.
2. Set inquiry condition values. |
| |
|
| |
|
| |
|
| |
3. Click "Inquire" button after the inquiry condition values are set. 4. In the course list, the "Add" buttons are shown as red for courses that had been registered. |
| |
|
|
Add Courses
|
|
I.
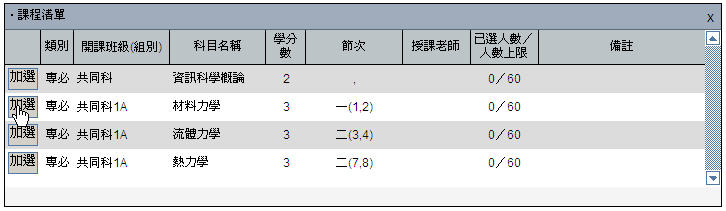
In windows of course lists in "Class/department course list", "Course inquiry window", etc., there is an "Add" button to the left of each course, click this button and the system will determine if you can add this course, and display a message to let you know if the course has been added.
|
| |
|
| |
|
|
II.
When the "Add" button is clicked, the system processes the request, then displays the "Course has been added" message, and adds the course in the "My schedule" window and updates the credits registered. |
| |

|
|
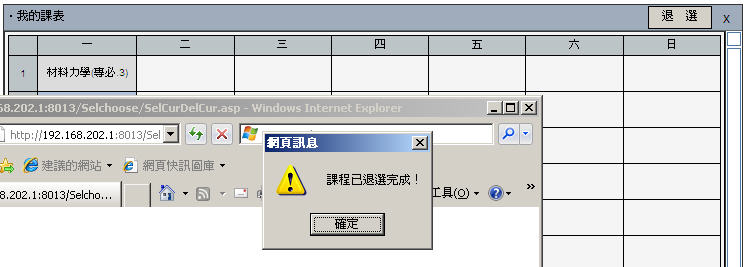
Drop Courses
|
|
I.
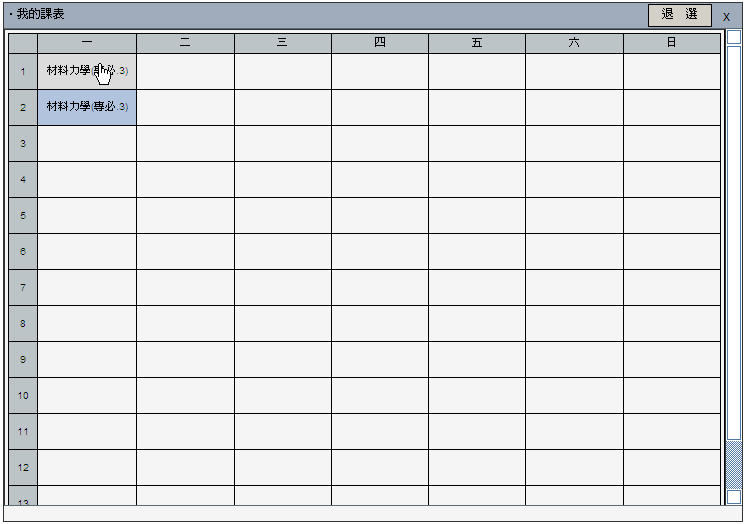
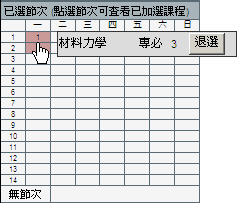
In the small course schedule at the center or the lower-left corner of "My schedule" window, click the course you wish to drop, then click the "Drop" button, the system will check all conditions and display a success message when the drop request has been processed successfully; otherwise, the system will display reasons why the drop request can't be processed.
|
| |
|
| |
|